Uploading a CSV
Under 2 – Choose Recipients, select Upload a CSV to bring in a spreadsheet of recipients. Every column in your file becomes a field you can insert into your message.
Demo
Step-by-step example
You can add any column you want to your CSV, and then pipe that field into your messages.
Your CSV/spreadsheet must have at least one phone number column.
Here's an example that may be useful to teachers.
A CSV like this:
| Student Name | Student Number | Parent Number | Grade | Subject |
|---|---|---|---|---|
| Steffanie | (111) 222-3333 | (111) 222-4444 | 95 | Algebra |
| Jack | (111) 222-3334 | (111) 222-4445 | 85 | US History |
And a Message like this:
Would generate these 2 group texts:
Alternatively, if you've disabled sending group texts in the 1 – Choose Settings section, it would generate these 4 individual texts:
So you could easily send custom individual messages to both students and parents about a recent test.
Choosing which columns to text
If your CSV has more than one phone number column, Bulk Texter Pro asks which of them should be used as recipients as soon as you upload the file:
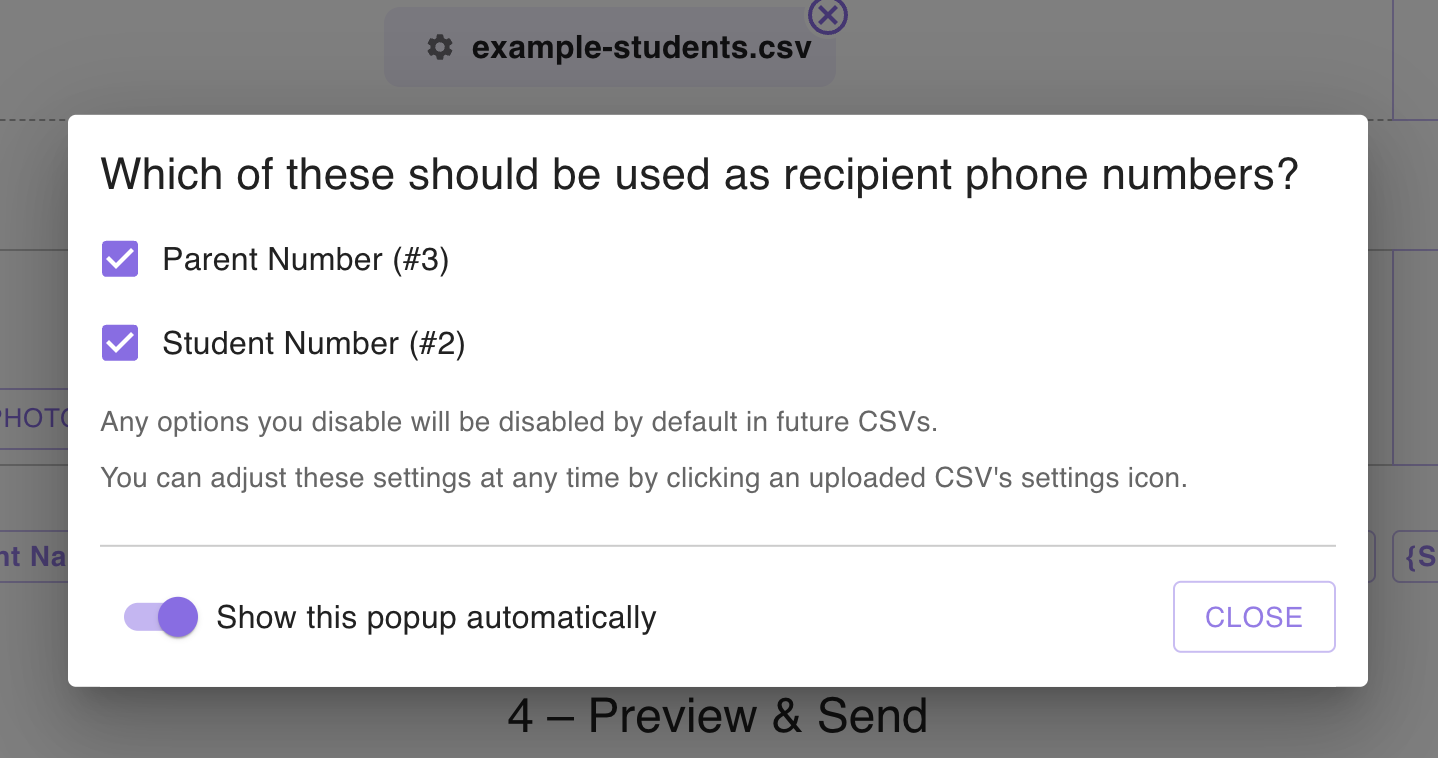
Any option you turn off will stay off by default for future CSVs. You can reopen this window at any time by clicking the settings icon next to the uploaded CSV's name, and you can stop it from opening automatically with the Show this popup automatically toggle.
Special columns
Some column names are special in Bulk Texter Pro, and can be used to automate your texts even more.
Phone numbers
Your CSV/spreadsheet must have at least one phone number column. If you want to send group texts, just add multiple phone number columns to your CSV. Each phone number in a row will be added to the recipients list for that text.
Phone number column headers can be formatted like any of these:
NumberNumber 2Cell #3MobilePhone #5- etc.
Each phone number column name must be unique.
FLVS / VSA spreadsheets
For our Florida Virtual School users, we have special handling for the Secondary Phone(s) column.
As long as you leave the default formatting in place, i.e.:
Virtual School Counselor (by District) Home: (123) 456-7890 ; School-Based Counselor Work: (123) 456-7890 ; Mother Cell: (123) 456-7890 ; Student's School Work: (123) 456-7890 ;
Bulk Texter Pro will automatically parse out the phone numbers, and allow you to select which phone number labels you want to use as recipients. See Choosing which columns to text above.
Recipient first name
When Bulk Texter Pro sees a column with "Name" in it, it will automatically extract the first name, and offer an extra field for it below the message box. It's marked with a ✨ and labelled First Name (from your column), to make it clear that it's generated by Bulk Texter Pro rather than being a real column in your file.
If you have a CSV like this:
| Student Name | Primary Phone |
|---|---|
| Jones, Jessie | (111) 222-3333 |
| McKennan, McKayla Melissa | (111) 222-4444 |
| Jennifer Marie Johnson | (111) 222-3334 |
| TOM JONES | (111) 222-4445 |
And a Message like this:
Bulk Texter Pro will generate the following texts:
The generated first name field handles names in all of the formats found in the example above.
Columns already named exactly "First Name" or "Last Name" don't get a generated field, since they're already just a name.
ScheduledSendTime
You may add a column titled ScheduledSendTime, which allows you to send each individual message in your spreadsheet at a specified time.
The ScheduledSendTime values in each row must be in one of these formats:
- 9/16/2023 4:00pm
- 9/16/2023 16:00:00
- 2023-09-16 4:00pm
- 2023-09-16 16:00:00
If the ScheduledSendTime column is present, but a row has an invalid or missing value for that column, the text will be sent as scheduled with the overall text batch, rather than having a custom individual time.
You can download an example CSV with this column here: example-scheduled-send-time.csv.
PhotoFileName
You may add a column titled PhotoFileName, which allows you to send a distinct photo with each text. This is only supported when sending via Google Photos with Google Voice – learn more in our Google Voice guide.
SendMessage
You may optionally add a column titled SendMessage, for which messages will only be sent if the cell's value is True.
To avoid sending texts for some rows in your spreadsheet, add a value of False to the SendMessage column in those rows, or leave the value empty.
You can download an example CSV with this column here: example-send-message.csv.
Additional tips
- If you are uploading an .xlsx file, the data that you want to import into messages must be in the first spreadsheet in the workbook.
- Each column name should be unique.
- Your columns can cross-reference each other. For example, if you have a column
Subjectand a columnComment,Commentcould contain something likeYou did great on your {Subject} test!. Then, in Bulk Texter Pro, you could put something likeHi {name}, {comment}, and it would insert all the needed fields from your spreadsheet. - Your fields are listed under the message box as soon as you upload, before you've written anything. Hover over a field to see an example value pulled from the first row of your file, so you can confirm you're inserting the right column.
- You can also drag your CSV/spreadsheet onto the upload area, instead of using the Upload CSV button.
- Use the Recent button next to the upload area to reload a CSV you've used before.
- If the values from your CSV aren't looking right in Bulk Texter Pro, try toggling on or off the Use raw / unprocessed CSV values option in Settings, under the account menu at the top right of Bulk Texter Pro.
- Bulk Texter Pro supports CSVs up to 10,000 rows. If your file is longer, only the first 10,000 rows will be used.